
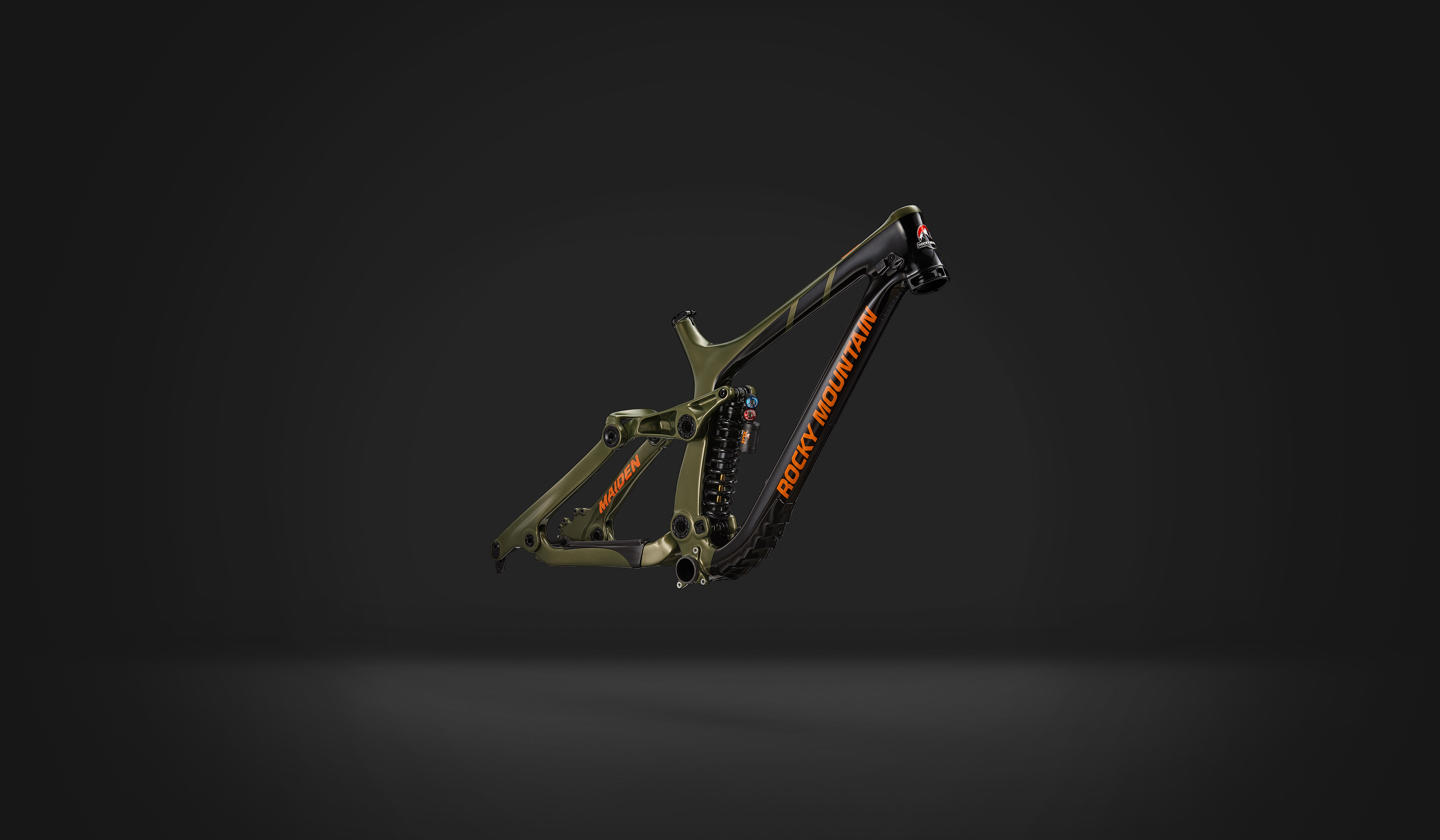
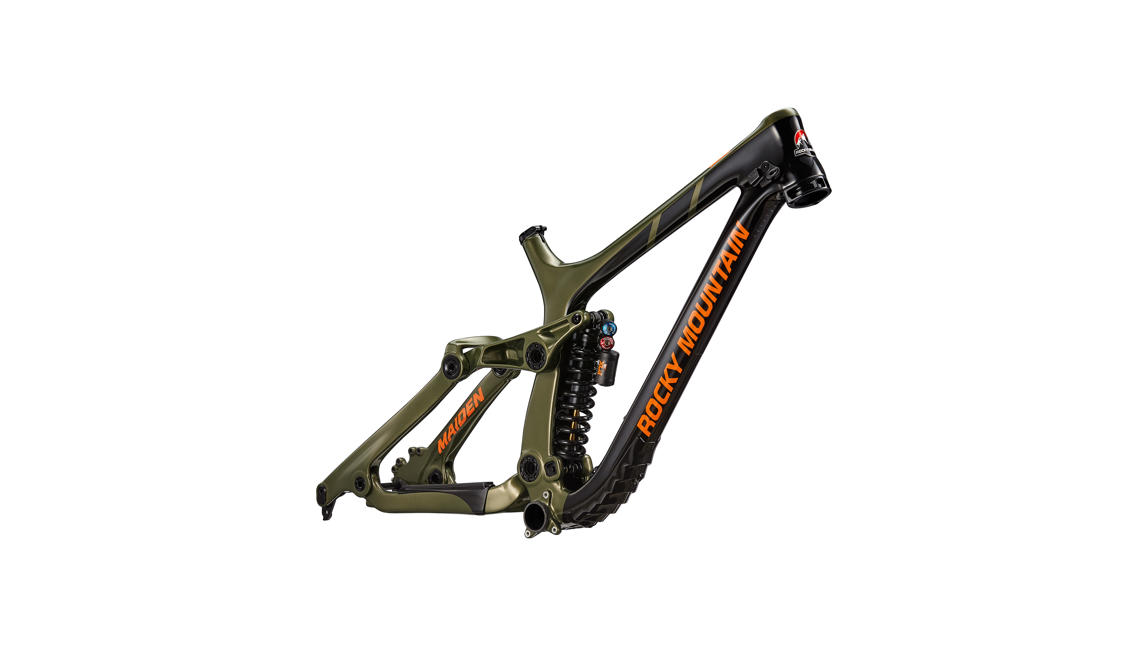
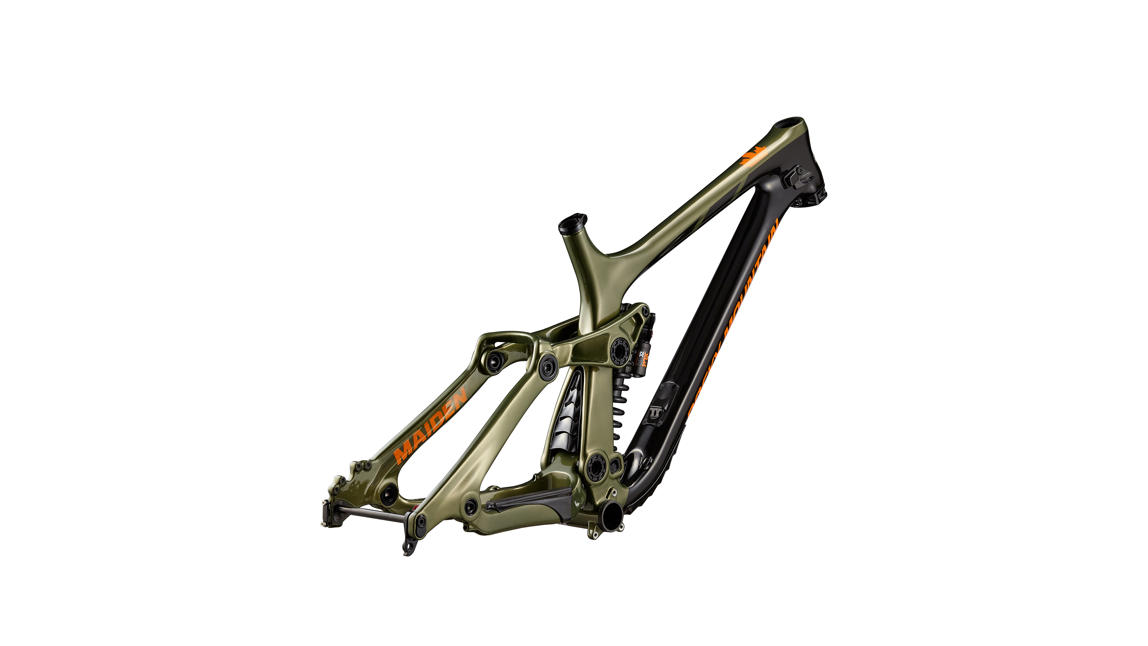
Maiden
Specifications: Maiden Carbon Frameset
-
- Frame SMOOTHWALL™ Carbon. Full Sealed Cartridge Bearings. Press Fit BB. Internal Cable Routing. ISCG05 Tabs. RIDE-4™ Adjustable Geometry. Equalized Wheel Concept.
- Sizes S - M - L - XL
-
- Shock Fox DHX2 Factory
- Rear Travel 200mm
We make every effort to ensure accuracy, but reserve the right to update specifications & prices without notification
Geometry: Maiden Carbon Frameset
Riding Style
| s | m | l | xl | |
|---|---|---|---|---|
|
|
||||
| TTH Top Tube Length - HORZ | 571 571mm | 589 589mm | 603 603mm | 621 621mm |
| HTA Head Tube Angle | 63 63deg | 63 63deg | 63 63deg | 63 63deg |
| HTL Head Tube length | 115 115mm | 115 115mm | 115 115mm | 115 115mm |
| STA Seat Tube Angle - Effective | 74 74deg | 74 74deg | 74 74deg | 74 74deg |
| STL Seat Tube length | 406 406mm | 432 432mm | 457 457mm | 457 457mm |
| RC Rear Centre | 425 425mm | 425 425mm | 425 425mm | 425 425mm |
| BBD Bottom bracket drop | 9 9mm | 9 9mm | 9 9mm | 9 9mm |
| R Reach | 396 396mm | 414 414mm | 428 428mm | 446 446mm |
| S Stack | 611 611mm | 611 611mm | 611 611mm | 611 611mm |
| *SH Standover Height | 820 820mm | 820 820mm | 820 820mm | 820 820mm |
| WB Wheelbase | 1,188 1,188mm | 1,206 1,206mm | 1,220 1,220mm | 1,238 1,238mm |
| s | m | l | xl | |
|---|---|---|---|---|
|
|
||||
| TTH Top Tube Length - HORZ | 570 570mm | 588 588mm | 602 602mm | 620 620mm |
| HTA Head Tube Angle | 63.3 63.3deg | 63.3 63.3deg | 63.3 63.3deg | 63.3 63.3deg |
| HTL Head Tube length | 115 115mm | 115 115mm | 115 115mm | 115 115mm |
| STA Seat Tube Angle - Effective | 74.3 74.3deg | 74.3 74.3deg | 74.3 74.3deg | 74.3 74.3deg |
| STL Seat Tube length | 406 406mm | 432 432mm | 457 457mm | 457 457mm |
| RC Rear Centre | 425 425mm | 425 425mm | 425 425mm | 425 425mm |
| BBD Bottom bracket drop | 6 6mm | 6 6mm | 6 6mm | 6 6mm |
| R Reach | 399 399mm | 417 417mm | 431 431mm | 449 449mm |
| S Stack | 609 609mm | 609 609mm | 609 609mm | 609 609mm |
| *SH Standover Height | 821 821mm | 821 821mm | 821 821mm | 821 821mm |
| WB Wheelbase | 1,187 1,187mm | 1,205 1,205mm | 1,219 1,219mm | 1,237 1,237mm |
| s | m | l | xl | |
|---|---|---|---|---|
|
|
||||
| TTH Top Tube Length - HORZ | 570 570mm | 588 588mm | 602 602mm | 620 620mm |
| HTA Head Tube Angle | 63.5 63.5deg | 63.5 63.5deg | 63.5 63.5deg | 63.5 63.5deg |
| HTL Head Tube length | 115 115mm | 115 115mm | 115 115mm | 115 115mm |
| STA Seat Tube Angle - Effective | 74.5 74.5deg | 74.5 74.5deg | 74.5 74.5deg | 74.5 74.5deg |
| STL Seat Tube length | 406 406mm | 432 432mm | 457 457mm | 457 457mm |
| RC Rear Centre | 425 425mm | 425 425mm | 425 425mm | 425 425mm |
| BBD Bottom bracket drop | 2 2mm | 2 2mm | 2 2mm | 2 2mm |
| R Reach | 401 401mm | 420 420mm | 434 434mm | 452 452mm |
| S Stack | 608 608mm | 608 608mm | 608 608mm | 608 608mm |
| *SH Standover Height | 822 822mm | 822 822mm | 822 822mm | 822 822mm |
| WB Wheelbase | 1,186 1,186mm | 1,204 1,204mm | 1,218 1,218mm | 1,236 1,236mm |
| s | m | l | xl | |
|---|---|---|---|---|
|
|
||||
| TTH Top Tube Length - HORZ | 569 569mm | 587 587mm | 601 601mm | 619 619mm |
| HTA Head Tube Angle | 63.8 63.8deg | 63.8 63.8deg | 63.8 63.8deg | 63.8 63.8deg |
| HTL Head Tube length | 115 115mm | 115 115mm | 115 115mm | 115 115mm |
| STA Seat Tube Angle - Effective | 74.8 74.8deg | 74.8 74.8deg | 74.8 74.8deg | 74.8 74.8deg |
| STL Seat Tube length | 406 406mm | 432 432mm | 457 457mm | 457 457mm |
| RC Rear Centre | 425 425mm | 425 425mm | 425 425mm | 425 425mm |
| BBD Bottom bracket drop | -1 -1mm | -1 -1mm | -1 -1mm | -1 -1mm |
| R Reach | 404 404mm | 422 422mm | 436 436mm | 454 454mm |
| S Stack | 606 606mm | 606 606mm | 606 606mm | 606 606mm |
| *SH Standover Height | 824 824mm | 824 824mm | 824 824mm | 824 824mm |
| WB Wheelbase | 1,185 1,185mm | 1,203 1,203mm | 1,217 1,217mm | 1,235 1,235mm |
| s | m | l | xl | |
|---|---|---|---|---|
|
|
||||
| TTH Top Tube Length - HORZ | 571 571mm | 588 588mm | 603 603mm | 621 621mm |
| HTA Head Tube Angle | 63.2 63.2deg | 63.2 63.2deg | 63.2 63.2deg | 63.2 63.2deg |
| HTL Head Tube length | 115 115mm | 115 115mm | 115 115mm | 115 115mm |
| STA Seat Tube Angle - Effective | 74.2 74.2deg | 74.2 74.2deg | 74.2 74.2deg | 74.2 74.2deg |
| STL Seat Tube length | 406 406mm | 432 432mm | 457 457mm | 457 457mm |
| RC Rear Centre | 425 425mm | 425 425mm | 425 425mm | 425 425mm |
| BBD Bottom bracket drop | -2 -2mm | -2 -2mm | -2 -2mm | -2 -2mm |
| R Reach | 398 398mm | 416 416mm | 431 431mm | 449 449mm |
| S Stack | 610 610mm | 610 610mm | 610 610mm | 610 610mm |
| *SH Standover Height | 816 816mm | 816 816mm | 816 816mm | 816 816mm |
| WB Wheelbase | 1,184 1,184mm | 1,202 1,202mm | 1,216 1,216mm | 1,234 1,234mm |
| s | m | l | xl | |
|---|---|---|---|---|
|
|
||||
| TTH Top Tube Length - HORZ | 570 570mm | 588 588mm | 602 602mm | 620 620mm |
| HTA Head Tube Angle | 63.5 63.5deg | 63.5 63.5deg | 63.5 63.5deg | 63.5 63.5deg |
| HTL Head Tube length | 115 115mm | 115 115mm | 115 115mm | 115 115mm |
| STA Seat Tube Angle - Effective | 74.5 74.5deg | 74.5 74.5deg | 74.5 74.5deg | 74.5 74.5deg |
| STL Seat Tube length | 406 406mm | 432 432mm | 457 457mm | 457 457mm |
| RC Rear Centre | 425 425mm | 425 425mm | 425 425mm | 425 425mm |
| BBD Bottom bracket drop | -5 -5mm | -5 -5mm | -5 -5mm | -5 -5mm |
| R Reach | 401 401mm | 419 419mm | 433 433mm | 451 451mm |
| S Stack | 608 608mm | 608 608mm | 608 608mm | 608 608mm |
| *SH Standover Height | 818 818mm | 818 818mm | 818 818mm | 818 818mm |
| WB Wheelbase | 1,183 1,183mm | 1,201 1,201mm | 1,215 1,215mm | 1,233 1,233mm |
| s | m | l | xl | |
|---|---|---|---|---|
|
|
||||
| TTH Top Tube Length - HORZ | 569 569mm | 587 587mm | 601 601mm | 619 619mm |
| HTA Head Tube Angle | 63.7 63.7deg | 63.7 63.7deg | 63.7 63.7deg | 63.7 63.7deg |
| HTL Head Tube length | 115 115mm | 115 115mm | 115 115mm | 115 115mm |
| STA Seat Tube Angle - Effective | 74.7 74.7deg | 74.7 74.7deg | 74.7 74.7deg | 74.7 74.7deg |
| STL Seat Tube length | 406 406mm | 432 432mm | 457 457mm | 457 457mm |
| RC Rear Centre | 425 425mm | 425 425mm | 425 425mm | 425 425mm |
| BBD Bottom bracket drop | -8 -8mm | -8 -8mm | -8 -8mm | -8 -8mm |
| R Reach | 404 404mm | 422 422mm | 436 436mm | 454 454mm |
| S Stack | 606 606mm | 606 606mm | 606 606mm | 606 606mm |
| *SH Standover Height | 819 819mm | 819 819mm | 819 819mm | 819 819mm |
| WB Wheelbase | 1,182 1,182mm | 1,200 1,200mm | 1,214 1,214mm | 1,232 1,232mm |
| s | m | l | xl | |
|---|---|---|---|---|
|
|
||||
| TTH Top Tube Length - HORZ | 568 568mm | 586 586mm | 600 600mm | 618 618mm |
| HTA Head Tube Angle | 64 64deg | 64 64deg | 64 64deg | 64 64deg |
| HTL Head Tube length | 115 115mm | 115 115mm | 115 115mm | 115 115mm |
| STA Seat Tube Angle - Effective | 75 75deg | 75 75deg | 75 75deg | 75 75deg |
| STL Seat Tube length | 406 406mm | 432 432mm | 457 457mm | 457 457mm |
| RC Rear Centre | 425 425mm | 425 425mm | 425 425mm | 425 425mm |
| BBD Bottom bracket drop | -12 -12mm | -12 -12mm | -12 -12mm | -12 -12mm |
| R Reach | 407 407mm | 425 425mm | 439 439mm | 457 457mm |
| S Stack | 604 604mm | 604 604mm | 604 604mm | 604 604mm |
| *SH Standover Height | 820 820mm | 820 820mm | 820 820mm | 820 820mm |
| WB Wheelbase | 1,181 1,181mm | 1,199 1,199mm | 1,213 1,213mm | 1,231 1,231mm |
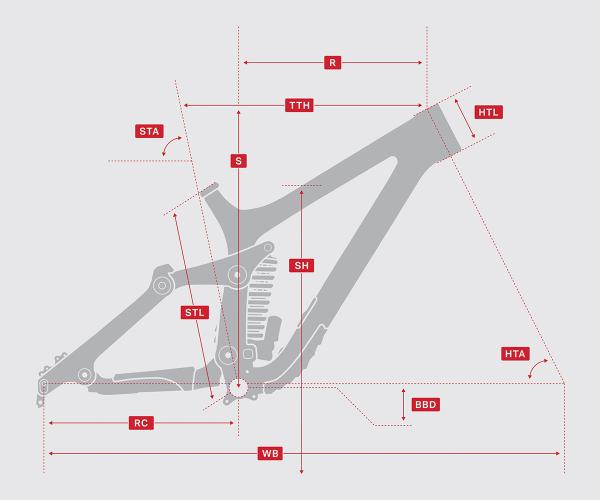
- TTH: Top Tube Length - HORZ
- TTL: Top Tube length - Actual
- HTA: Head Tube Angle
- HTL: Head Tube length
- STA: Seat Tube Angle - Effective
- STL: Seat Tube length
- RC: Rear Centre
- BBD: Bottom bracket drop
- BBH: Bottom bracket height
- R: Reach
- S: Stack
- *SH: Standover Height
- WB: Wheelbase
- FC: Front-Centre
- FO: Fork Offset
*We measure Standover Height 200mm forward from the centre of the bottom bracket. It's measured this way to provide you with the best possible information when looking at frame geometry.
We make every effort to ensure accuracy, but reserve the right to update specifications & prices without notification.
Technologies: Maiden Carbon Frameset
-
-

Equalized wheel concept
Geometry
There are advantages to different wheel sizes in different situations. Our Equalized wheel concept allows riders to choose their preference without compromising steering dynamics. Other companies simply provide two axle positions, which negatively affects BB height and fork trail. Instead, our Equalized system uses a headtube spacer in conjunction with two rear axle positions to maintain optimized geometry and handling regardless of which wheel size is used.
-

Size Specific tune
Suspension
Size Specific Tune ensures that riders of all sizes get the right balance of small-bump compliance, mid-stroke support, and end-stroke progressiveness. Our design team does custom shock tunes based on real world field testing, and adjusts each tune for specific frame sizes.
-

Pipelock™ collet
Frame Construction
Pipelock™ collets expand radially and lock into the frame, creating the widest and most rigid pivot stance possible. Using Pipelock collets allows us to lower our front triangle pivot-weights while maximizing lateral stiffness.
-
-
-

Smoothlink suspension
Suspension
Smoothlink suspension is efficient yet supple when you’re on the pedals and across a wide range of gears. It features a controlled end-stroke and a rate-curve that feels more capable than the travel would suggest. This four-bar suspension design philosophy is centred on ride characteristics; each bike platform we develop balances variables like anti-squat, axle path, chain growth, rate curve, anti-rise, etc. to achieve the legendary Rocky Mountain ride feel.
-

Smoothwall carbon
Frame Construction
Smoothwall carbon uses one of the world’s most sophisticated carbon processes to deliver industry leading stiffness-to-weight, ride quality, and durability. We eliminate excess resin and fibers by using rigid internal molds instead of traditional air bladders. We then utilize different types of carbon in specific frame areas to maximize stiffness and impact resistance while minimizing overall weight.
-

RIDE-4 adjustment system
Geometry
The RIDE-4 adjustment system allows riders to quickly fine-tune their geometry with a pair of Allen keys. Four configurations are possible thanks to one rotating chip. This allows for subtle geometry changes with minimal effect on your shock tune.
-
We make every effort to ensure accuracy, but reserve the right to update specifications & prices without notification.
